
Amusingly, one of the suspension links does keep popping out of its socket…


Amusingly, one of the suspension links does keep popping out of its socket…


Thanks! The quantity of 3D printed parts on my kid’s toys is truly amusing.


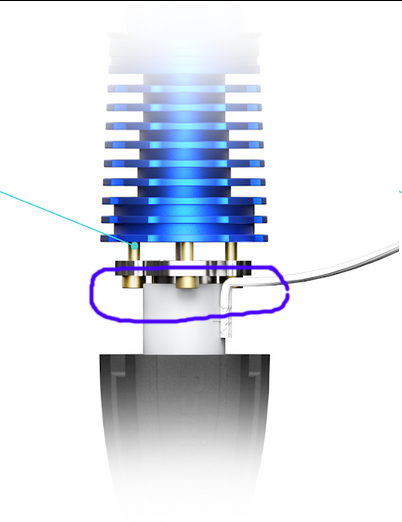
It was truly the hot end. The hot part of the hot end was starting to fall off the heat break due to the three screws that held them together loosening. Fixing involved disassembly, some clean up, and reassembly.


They’re TMC2209 drivers. Looking through my printer.config, I think stealthchop is disabled on all my motors. They each have this entry:
stealthchop_threshold: 0


It did somewhere along the lines due to my hot end shaking itself apart, but I fixed that before attempting the cube on the left. There’s maybe a small reduction in ringing, but homing is a whole lot more consistent now.


Extrusion variance is one of the reasons why I was focusing on my extruder. I’ll have to try a different brand of filament though. I’ve been printing more or less exclusively in Pokymaker ASA. It’s cheap, and prints well enough, but I can’t find tolerance info on it.
Z-hop is not disabled, I’ll have to give that a shot. This is a Voron 2.4, which has geared and belted Z. I’ll have to do the math to see what the actual resolution per full step is later tonight.
I’ve given the gantry a once over twice now and everything seems square/right and moves freely.
Right now I’m thinking my order of attack will be:
Thanks for the intel! Here’s hoping that the purple holds.


Not at all, that’s part of the reason for this post. I did give all the screws a once over and everything is nice and tight. The tool head was completely rebuilt between the first and second cubes. I’m on team kicky and it’s been pretty reliable/repeatable.
That would be a truly amusing outcome, lol. You’re right - time will tell. But thankfully at least I’ll know what to look out for this time around.


Thank you for the more detailed reply. The part in question is is a Voron Design Cube. I printed it on my 350mm Voron 2.4. The print does match the source STL fairly well, but it does look like OrcaSlicer’s result (blue) has more corner rounding than the SuperSlicer results. There’s a 45 degree chamfer on both the lower and upper face of the Z, which might contribute to what you’re seeing. The parts themselves are also physically not that large, so you might be seeing a bit of the impact of the nozzle being round too.


It might be a flow issue. I recently discovered that my hot end was coming apart, which was leading to some print inconsistencies. This is my first print after fixing that, and swapping extruder gears while I was in there. I’ll have to check my belts and take another pass through Ellis’s tuning guide.
I am running klipper, and even have an accelerometer mounted to my tool head, but haven’t taken the time to put some temporary wiring in place to test/tune it. I’ll also have to do that. I do see some fine/faint ringing in the parts.
As for these prints, they were printed fairly quickly on a 0.4mm nozzle with 0.2mm layer height in Polymaker ASA.


Haha, sounds like fun. This is a Voron 2.4 350, so it has the (dis)advantages of being big/having long belts and having a hot end that’s biased toward speed. I’ve run a spool of TPU through it somewhat recently and at this point I basically daily ASA. PETG parts look better, but I have not tried a PETG cube yet. Maybe I should.
Thanks for digging around for pics! I appreciate the reference.


What do you mean? The quality of the cubes themselves or the surface finish? There is a bit of skin defect going on and it looks like OrcaSlicer introduced some corner rounding about 1/3 of the way up the blue cube. I still need to run input shaper, but the prints don’t seem that bad? Maybe my standards are low s because of the absolutely appalling quality of my old I3 clone.
This is also intentionally pretty harsh lighting. I just added the OP to add a photo with more diffuse lighting and all three prints look way more like what you’ll find on the web.


This makes me sad. The center and left cube are pretty solid in person until you get direct overhead light on them.
I just added another photo to the OP with a more diffused light sourced. It makes all three parts look pretty good.
I do kind of wonder if this is a compromised based on speed. I wouldn’t say I’m going fast, but I am running 110 perimeters and 3k accelerations. Maybe I should print a slower cube.
Other ideas are welcome :)
Threadlocker is often used in automotive applications, like engines, but an engine rarely exceeds much above 110 °C. Looking at the datasheet for 222, it’s rated for 150 °C, but it does look like it loses strength as it warms up and it also starts to break down above 120 °C.
I can’t see it hurting, but it might not be as long term a fix as I had hoped. If it comes apart again, I’ll have to try 272. It’s rated for “up to” 232 °C.
I am very curious how hot the heat break actually gets.
Happy to help! For a little more context on the pictures: the hot end is available with blue and black anodizing. I have the black version (mostly because that was what was in stock). In my photo, the back silicone sock has been removed. Here’s a better photo, also from the linked page. I’ve circled the three screws I’m talking about.

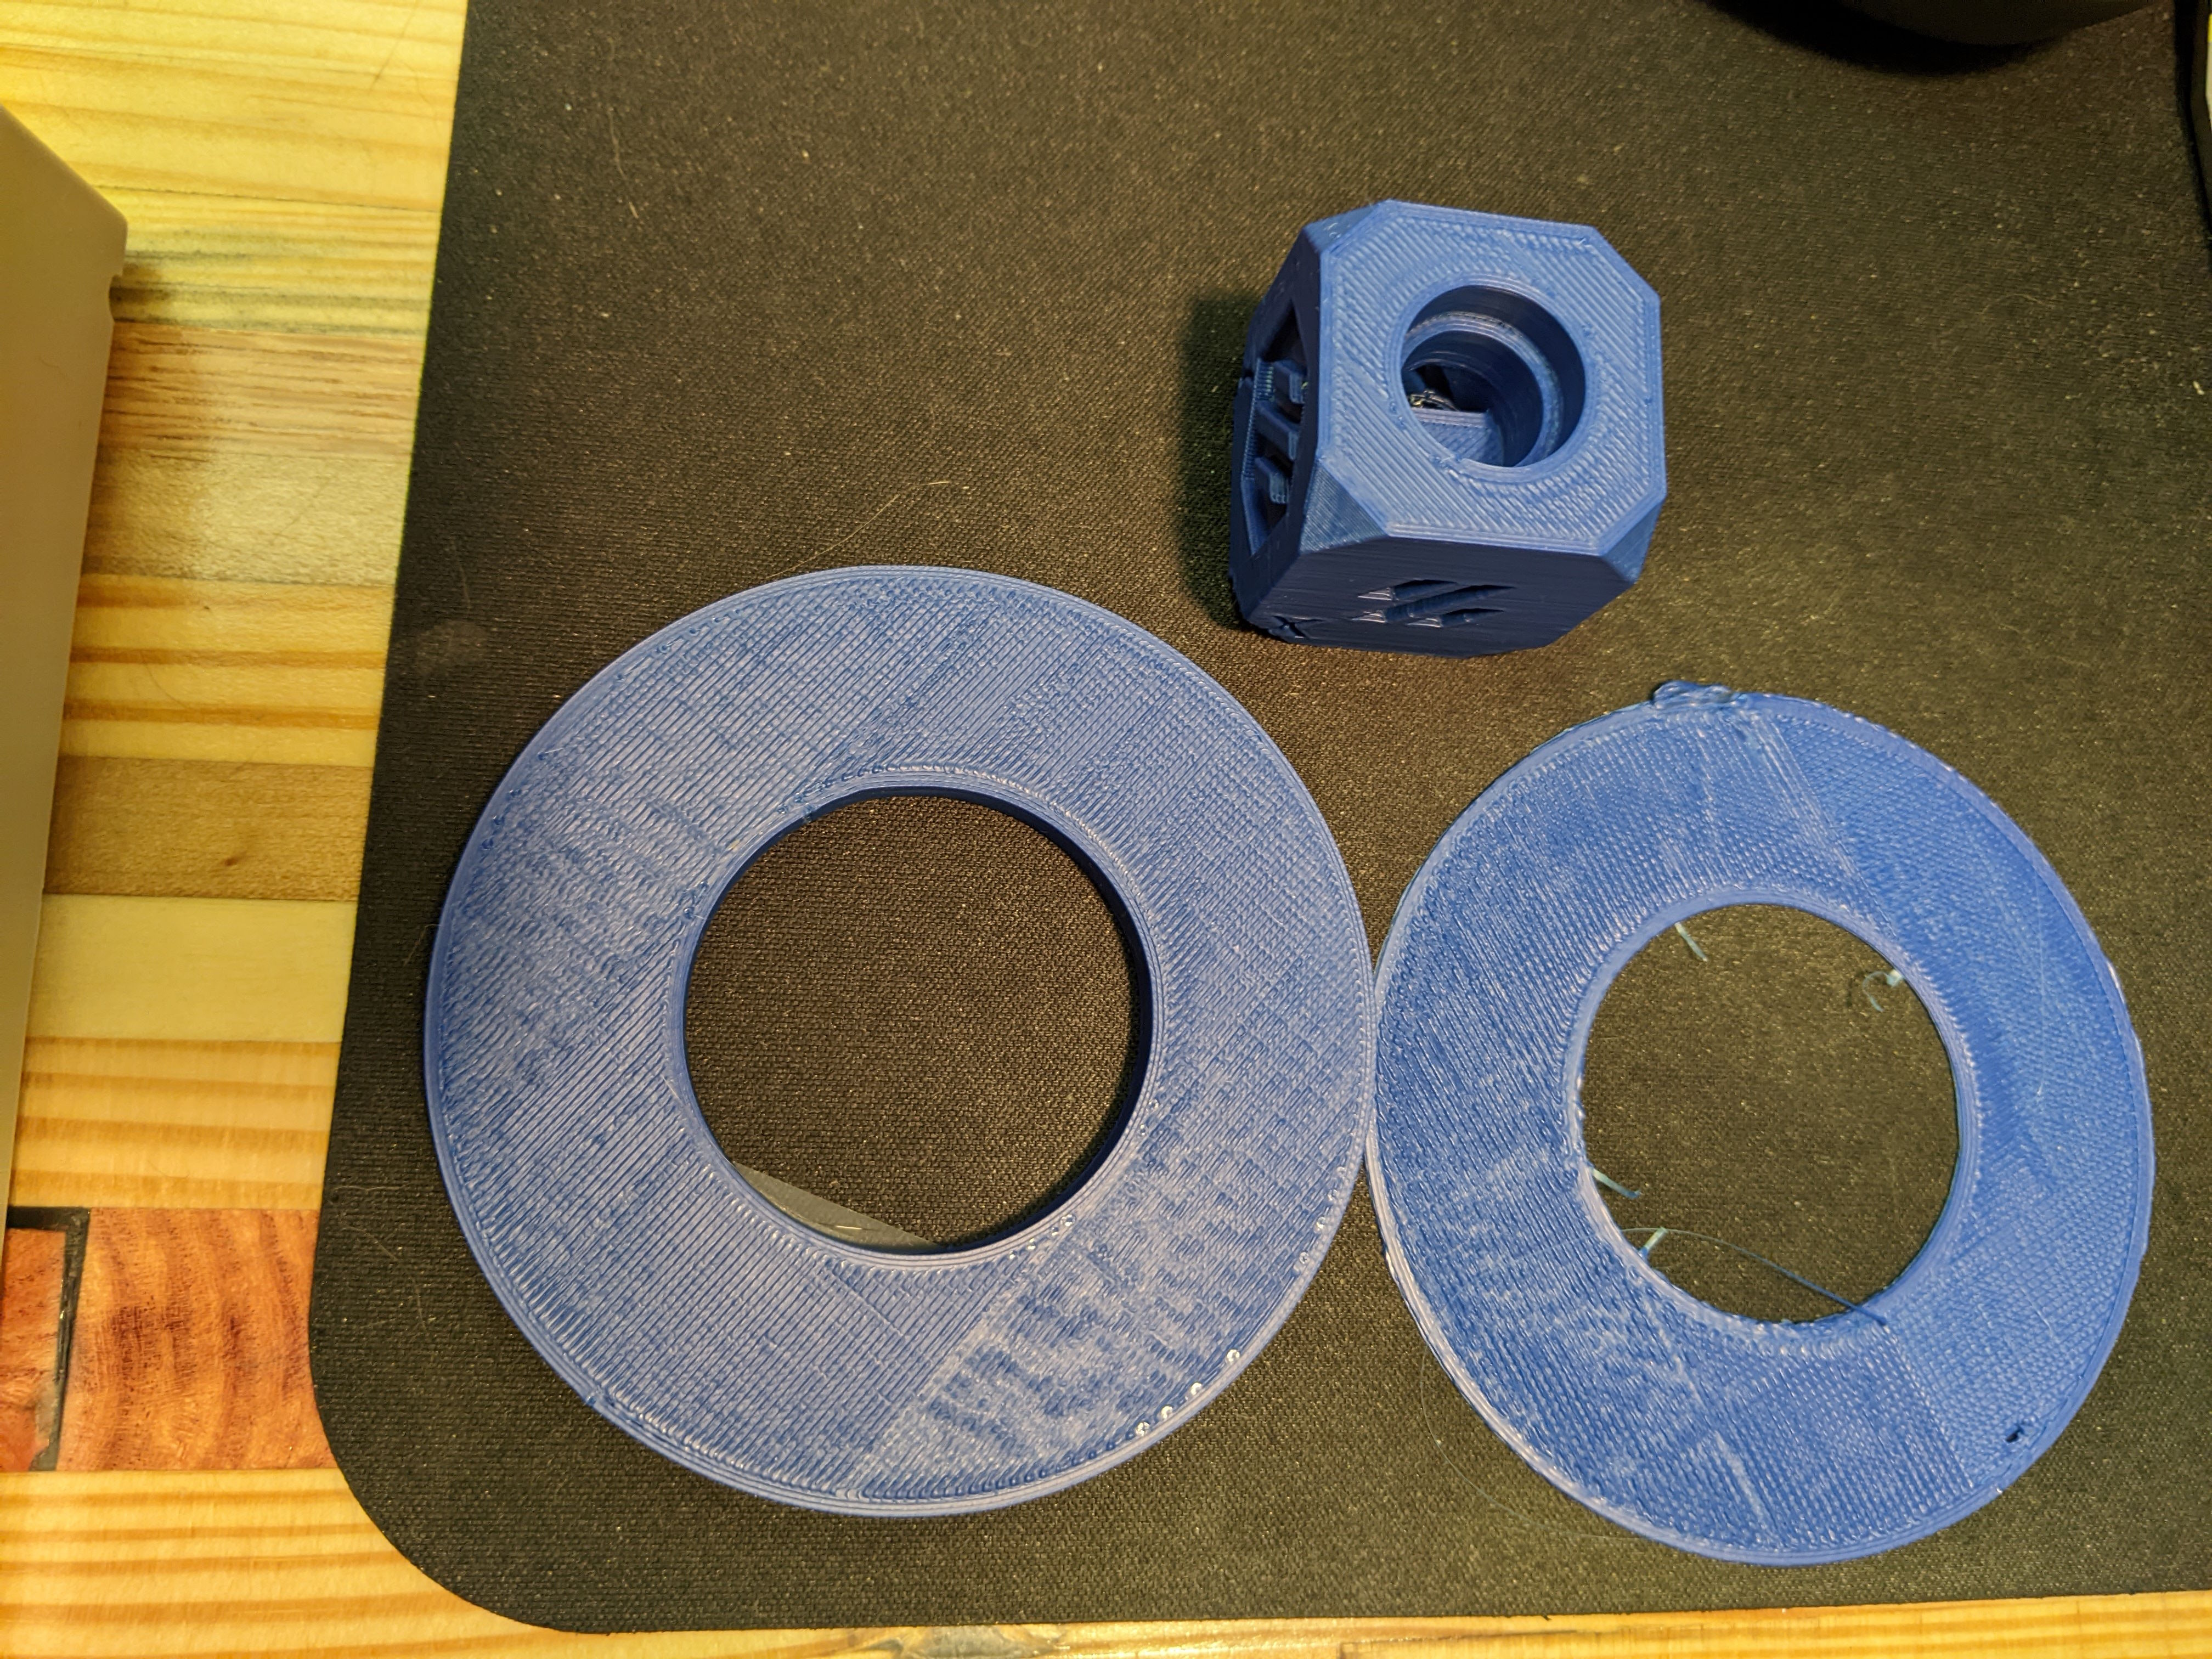
Here are two before and one after. Lower left = top layer over extrusion, but the bottom was fine. Lower right = that’s only 2-3 layers in total, but since it was way too close to the bed it was rippling like crazy. The cube = hot off the press and looking pretty good.

I didn’t take any fixed photos of the hot end, but this page has a number of pictures showing what it should look like (look at the three screws if you didn’t see them sticking out in my earlier picture).
Thanks!
Are you looking for prints that were of varrying degreea of quality, the printer itself (it’s a Voron 2.4 so there’s a decent build behind it), or what the hot end should look like when properly assembled?
On my i3 clone, printing leveling wheels that fit pretty tightly on the bed screws (so they wouldn’t back off) and swapping coiled metal springs for silicone bushings greatly reduced how often I had to level my bed. After that, the most useful thing I did was swapping an ultrabase glass bed (this was before PEI spring steel was widely available) and getting in the habit of keeping it clean.
I agree with your overall sentiment, but I personally find googles fuel savings optimistic and/or flat out misleading. “Hey, you could turn off your usual route here and get there in a similar time… Or you could stay on your usual route and save 2% on gas” seems to be a very frequent occurrence for me.
I also don’t think that needs AI. The pathfinding algorithm just needs to apply different weights to the choices based on things like changes in elevation, number of stop signs, total distance, etc. Navigation systems from yester-year could do this well before the prevalence of AI. That said, AI can be used to develop and/or tune these algorithms instead of having a dedicated team of humans focused on this specific area.